

You will love these fermented beets and cauliflower with garlic and dill as a side or condiment to any meal or as a flavoursome snack on your antipasto platter. Full of gut-beneficial bacteria (probiotics!), this is a great template recipe for lacto-fermented pickles that you can use for preserving most surplus vegetables. And, how about that colour!?!
I love lacto-fermented pickles made with any vegetables! Fermented foods are full of probiotics, which are great for supporting your immune system. My favourite would have to be sauerkraut, which I make on a regular basis, but I also often ferment other things like carrots, celery, cauliflower and beets.
Pickling vs Fermenting
The main difference between fermenting and pickling is the preservation process, which results in that tangy, sour flavour. Pickled foods are soaked (preserved) in an acidic brine, usually made with vinegar, which gives them a sour and typically sweet flavour as sugar is often added. Fermented foods are tangy because of the lactic acid produced during the reaction between present sugars and bacteria. Sauerkraut and kimchi are fermented; gherkins are pickled. Cabbage can also be pickled. Pickled vegetables are delicious, however, they do not contain live bacteria which is so beneficial for our gut!
FERMENTED BEETS & CAULIFLOWER
This fermentation recipe is a great way to preserve beets (beetroot) and cauliflower but you can also use it for making fermented carrots, beans, radish, onions or peppers. As well as using salt to preserve the vegetables, aromatics like garlic and green onions, as well as black peppercorns, bay leaves and fresh dill are added for flavour. Dill is fabulous with fermented vegetables! These are gluten-free, paleo, Whole30, low-carb, Mediterranean, low-calorie, vegan-friendly.
HOW TO FERMENT BEETS & CAULIFLOWER
Find the full list of ingredients in the recipe card below. Here is a step-by-step process with photos to guide you along.
For the amount of beetroot or cauliflower used, you will need two 1-litre jars with tight lids (and maybe 1 extra small one)
Step 1. Wash the jars and the lids in hot water with soap or dishwashing liquid and rinse well. Place upside down on a towel to drain.
Step 2. Prepare the vegetables, herbs, garlic and spices. Peel the beets and cut them into wedges. Wash the cauliflower and cut it into small florets.
Step 3. Stuffing the jars (see below). Add 3 garlic pieces and a few peppercorns, a sprinkle of dill and 2-3 spring onion pieces to the bottom of the jar. Top with a layer of cauliflower and beets. Add more dill, spring onions, garlic and peppercorns and one bay leaf. Continue filling the jar in this fashion, finishing with one more bay leaf right at the end. You should use up half of the garlic, spring onions, dill and peppercorns.
Fill the jar to the top very tightly but leave 1.5-2-cm space between the lid and the vegetables.
Step 4. Make a fermenting saltwater brine. You will need about 500ml to 700ml (2-3 cups) of the salty brine but this will depend on the size of the jars (you might use 2 very large jars or 1 large and 2 small jars etc). The more stuffed the jar is, the less liquid you will need to submerge all the vegetables. I usually make more saltwater brine than I need.
SALT TO WATER RATIO FOR LACTO FERMENTING
Typically a 2% salt to water brine is used for fermenting harder vegetables such as beets, cauliflower, carrots, onions, radishes and garlic. For softer vegetables with higher water content, such as cucumbers, capsicum (bell peppers) asparagus, and zucchini, a 5% salt to water brine is recommended.
For example, for 1 litre of water (1000 grams on the scales), I would multiply 1000*0.02, which is 20 grams of salt (2%). That’s about 1.5-2 tablespoons depending on the salt granules.
To begin with, I usually mix 1 litre of water with 2 tablespoons of salt. You can always make extra brine if needed or discard the leftovers. Allow the salt to dissolve completely.
Step 5. Now that all our ingredients are stuffed in the jar, pour in the salt brine to submerge the vegetables. I like to fill it almost to the top but leave about 1/2cm of space between the liquid and the lid. Use your fingers to press down on the vegetables to make sure they are well underwater.
Pop the lid on top and close tightly. Store the jars in a warm place away from the sun or direct light. Make sure to put them on a plate or a tray to catch any fermenting juices that might escape the jar.
Fermentation times & burping the jars
Here is a basic fermentation timeline that you can use for preserving most lacto-fermented vegetables in saltwater brine.
Phase 1 – Initial fermentation – 36-72 hours
Allow about 48 hours for the initial fermentation to begin. During this time some bubbles may form and the pressure in the jar will start to build up. This will push the liquid to the surface. This process can take between 36 hours to 72 hours depending on how warm it is and how much salt you used.
I recommend checking after 36 to 48 hours to see it feels like the pressure is building up. Gently open the lid and if you hear a hissing release sound, then you know that some of that pressure is coming out. This is called ‘burping the jar’.
I usually open the lid to see if I need to discard a tablespoon or two of the liquid. I also press the vegetables down again as they often surface to the top. Again, make sure everything is submerged and there is only a little bit of space between the lid and the liquid. We want to eliminate as much oxygen as possible. Some people use weights on top of the vegetables to keep them down.
Phase 2 – Active fermentation – 2-3 days
After the first 48 hours, the fermentation will be pretty active so I like to check and burb the jar every 24 hours or so for the next 2-3 days. Once you check the jar and it doesn’t feel like it has too much pressure and bubbles built up, you’ve now entered the slow fermentation phase and you don’t need to look after it as much.
Phase 3 – Slow fermentation – 3-10 days
Once it feels like the fermentation isn’t producing as much pressure and bubbles, you can leave the jar alone for a few days to allow the veggies to ferment slowly and develop more flavour. The longer you leave them, the more sour/tangy they will get and softer in texture. I find that with sauerkraut and kimchi, they are ready to be moved to the fridge and for consumption after about 7 days. However, with vegetables that are fermented in saltwater brine, they are better after 10 days.
I like to taste the vegetables after 7 days. I prefer them a little crunchy so I move them to the fridge as soon as they are tangy/sour enough. Once in the fridge, they will continue to ferment at a very slow rate and can be kept for a few weeks if not longer.
EXTRA NOTES
Salt: I used plain old table salt here but you can use the fancy kind of more minerals and so on. But because I am using tablespoons of the stuff, I’m staying budget-friendly here.
Water: Some people say you should only use filtered water or bottled water but for these ferments, I used good ol’ tap water because it’s totally fine where we are. If you have a filter or Brita jug, you can use the more purified water.
MORE DELICIOUS CONDIMENTS RECIPES
Description
Learn how to make lacto fermented beets and cauliflower with saltwater brine, garlic and dill. This how-to recipe can be used to ferment most vegetables. Lacto fermented pickles are great as a side dish or a condiment with any meal and look fantastic on an antipasto platter or snack board. Full of gut-healthy probiotics and a great way to preserve surplus veggies.
Find the full list of ingredients in the recipe card below. Here is a step-by-step process with photos to guide you along.
You will need two 1-litre jars with tight lids (and maybe 1 extra small one) for the amount of beetroot or cauliflower used.
Preparation.
- Wash the jars and the lids in hot water with soap or dishwashing liquid and rinse well. Place upside down on a towel to drain.
- Prepare the vegetables, herbs, garlic and spices. Peel the beets and cut them into wedges. Wash the cauliflower and cut it into small florets.
Stuffing the jars.
- Add 3 garlic pieces and peppercorns, a sprinkle of dill and 2-3 spring onion pieces to the bottom of the jar. Top with a layer of cauliflower and beets. Add more dill, spring onions, garlic and peppercorns and one bay leaf. Continue filling the jar in this fashion, finishing with one more bay leaf right at the end. You should use up half of the garlic, spring onions, dill and peppercorns.
- Fill the jar to the top very tightly but leave 1.5-2 cm space between the lid and the vegetables.
Make saltwater brine.
- You will need about 500ml to 700ml (2-3 cups) of the salty brine but this will depend on the size of the jars (you might use 2 very large jars or 1 large and 2 small jars etc). The more stuffed the jar is, the less liquid you will need to submerge all the vegetables. I usually make more saltwater brine than I need.
- I usually mix 1 litre of water with 2 tablespoons of salt (20 grams). You can always make extra brine if needed or discard the leftovers. Allow the salt to dissolve completely.
- Pour in the salt brine in the jars to submerge the vegetables. I like to fill it almost to the top but leave about 1/2cm of space between the liquid and the lid. Use your fingers to press down on the vegetables to make sure they are well underwater.
- Pop the lid on top and close tightly. Store the jars in a warm place away from the sun or direct light. Make sure to put them on a plate or a tray to catch any fermenting juices that might escape the jar.
Fermentation stages & how to check on your vegetables.
- Allow about 48 hours for the initial fermentation to begin. During this time some bubbles may form and the pressure in the jar will start to build up. This will push the liquid to the surface. This process can take between 36 hours to 72 hours depending on how warm it is and how much salt you used.
- Check after 36 to 48 hours to see it feels like the pressure is building up. Gently open the lid and if you hear a hissing release sound, then you know that some of that pressure is coming out. This is called ‘burping the jar’.
- If there is too much liquid (all the way to the lid), discard a tablespoon or two. Press the vegetables down again as they often surface to the top. We want to submerge everything to eliminate as much oxygen as possible. Some people use weights on top of the vegetables to keep them down.
- After the first 48 hours, the fermentation will be pretty active; check and burp the jar every 24 hours for the next 2-3 days.
- Once it feels like the fermentation isn’t producing as much pressure and bubbles, you can leave the jar alone for a few days to allow the veggies to ferment slowly and develop more flavour. The longer you leave them, the more sour/tangy they will get and softer in texture. I find that with sauerkraut and kimchi, they are ready to be moved to the fridge and for consumption after about 7 days. However, with vegetables that are fermented in saltwater brine, they are better after 10 days.
- Taste the vegetables after 7 days. I prefer them a little crunchy so I move them to the fridge as soon as they are tangy/sour enough. Once in the fridge, they will continue to ferment at a very slow rate and can be kept for a few weeks if not longer.
Notes
Salt to water ratios: Typically a 2% salt to water brine is used for fermenting harder vegetables such as beets, cauliflower, carrots, onions, radishes and garlic. For softer vegetables with higher water content, such as cucumbers, capsicum (bell peppers) asparagus, and zucchini, a 5% salt to water brine is recommended. For example, for 1 litre of water (1000 grams on the scales), I would multiply 1000*0.02, which is 20 grams of salt (2%). That’s about 1.5-2 tablespoons depending on the salt granules.
Nutrition
- Serving Size: 2 wedges of beets + 2 cauliflower florets
- Calories: 67
- Sugar: 2.9 g
- Sodium: 502.9 mg
- Fat: 0.4 g
- Carbohydrates: 14.5 g
- Fiber: 2.6 g
- Protein: 3.4 g
- Cholesterol: 0 mg
Keywords: Fermentation, Fermenting, Lacto Fermentation, Pickles, Beets, Cauliflower, Beetroot, Probiotics
Very Incredible Basil Sauce Recipe
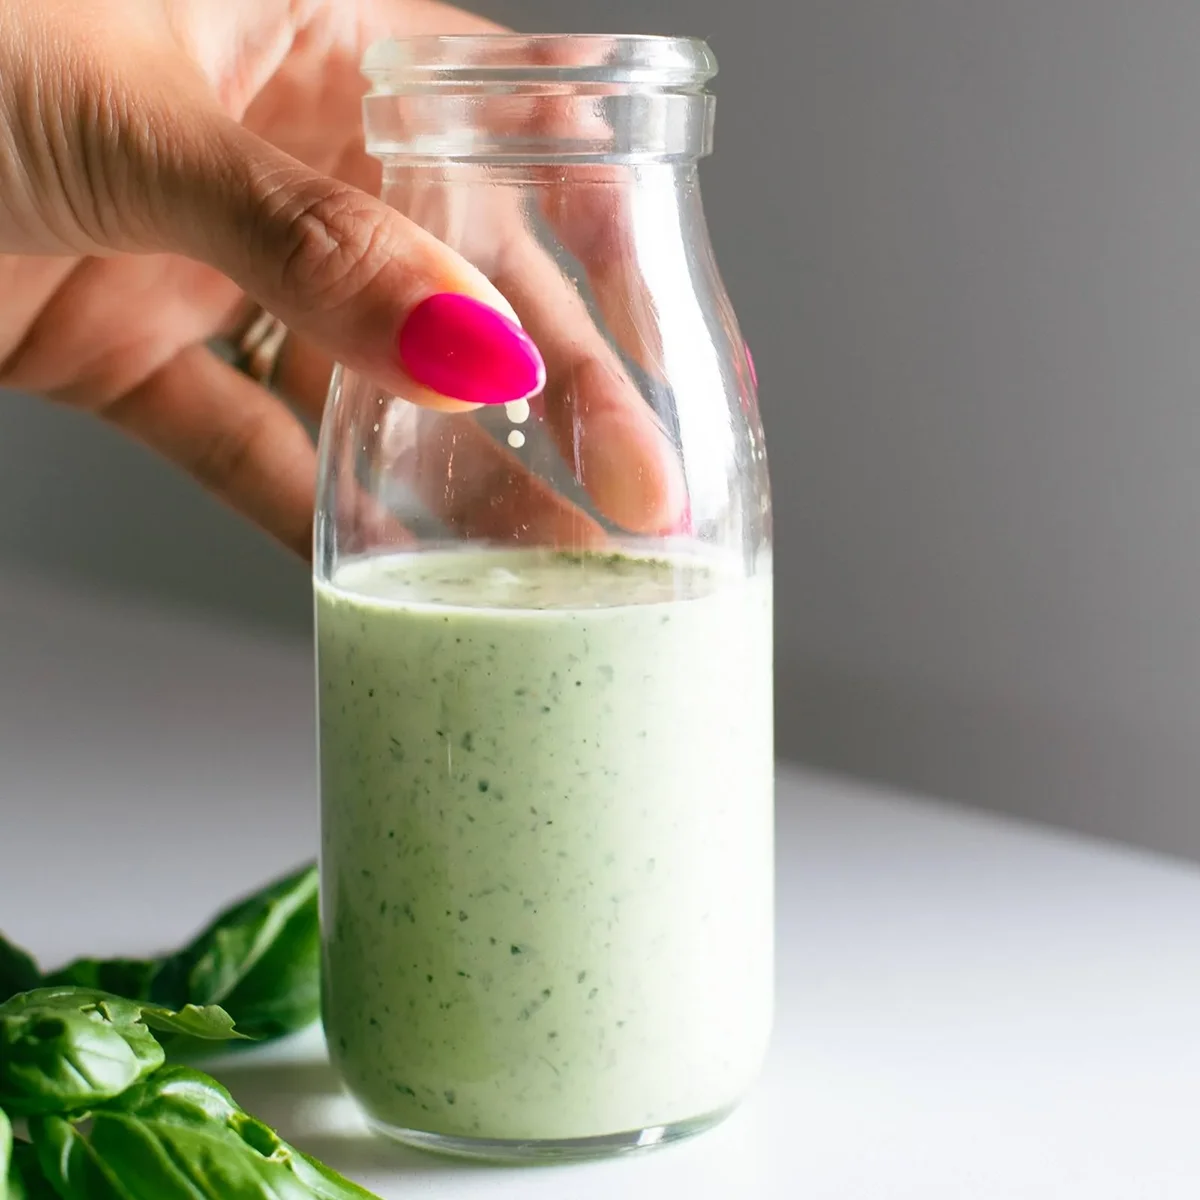
Punchy, salty, bright green sauce packed with fresh basil, chives, garlic, and a bit of oregano. This sauce can be poured out just about anything!
This creamy basil sauce is going on EV-ER-Y-THING in my life: sandwiches, eggs, grilled chicken and veggies, dipped with chips?! It’s so good, packed with green goodness, it’s beautifully summery, and I’m doing the most with it.
In This Post:
The main thing:
Other stuff:
How To Make This Basil Sauce
Step 1: Get All Your Ingredients Ready
You can use a blender, food processor, or a mini-chopper-type gadget. I love this mini-chopper (affiliate link). It’s not meant for sauces necessarily, but I use it all the time because it’s super compact.
Step 2: Blend Your Basil Sauce
That’s it! Just blend, taste, and adjust!
This sauce can be a bit chunky / textured, so keep it going until it has the consistency you want. I prefer something right before completely pureed – where it has just barely noticeable flecks of herbs, but it’s mostly smooth and creamy.
Step 3: Put It On All Your Yummy Things
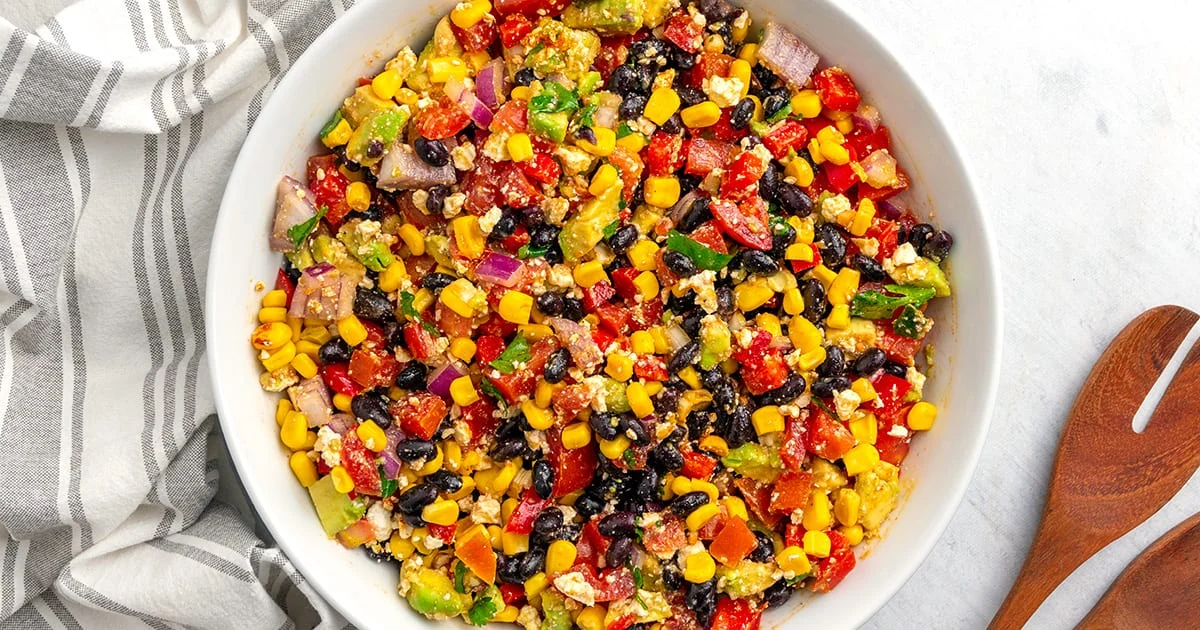
Like so. (Here’s that recipe.)
Lindsay’s Notes
Ooh baby. Basil, chives, garlic, and a tiny hit of oregano all in a creamy, salty, bright green sauce – I love this so much.
The first time I made this, my toddler (who mostly just eats crackers) found a spatula and just sat at the counter licking the remnants of the sauce out of the blender with me. And I hear that from a lot of people – many kids seem to be very into this for unknown reasons. Sometimes it just hits right, ya know? A+ for that experience.
My favorite thing about this sauce, besides that it tastes like heaven, is that makes healthy-ish eating something I really, actually look forward to.
Baked salmon goes up about 100 notches in my book when smothered in this creamy green sauce. Same goes for shrimp, chicken, and a big fresh salad or lots of roasted veggies.
This will not be the last we see of this sauce, which is why I decided to give it its own post on POY. Welcome home, little basil sauce.
Things You Could Put It On
The possibilities! They are endless.
Description
Punchy, salty, bright green sauce packed with fresh basil, chives, garlic, and a bit of oregano. This sauce can be poured out just about anything!
- Place all your sauce ingredients in a blender or food processor. (I use this mini chopper for the vast majority of my sauces because it’s nice and compact!)
- Blend until you get your desired consistency – I usually go for an almost-completely-smooth texture that is flecked with small bits of herbs.
Notes
Taste and adjust! More lemon juice will wake it up, Parmesan adds more umami and saltiness, and if it gets too salty for you, add a bit more mayo to dilute the pungency a bit!
Keywords: basil sauce, basil dressing
Recipe Card powered byFrequently Asked Questions For Basil Sauce
What can I use instead of mayo?I’ve seen some people on Instagram say they used Greek yogurt and liked it. I haven’t made it this way and I know I wouldn’t like it with Greek yogurt because it’s so tangy and has a different flavor. BUT, if you’re okay with it being a bit different than the original, I think Greek yogurt could work!
I have an egg allergy – what can I use?Vegan mayo has no eggs and tastes great! That’s what I’d use!
How long does the basil sauce last?I usually keep it in the fridge for 3-5 days.
Can you make this vegetarian / vegan?Yes! Use vegan mayo and vegan Parmesan! If you can’t find vegan Parmesan, just throw in a bit of extra salt to compensate for the change in flavor. And if you don’t want to use vegan mayo, try using an avocado like we did in this avocado mojo sauce.
Can you freeze this basil sauce?I would not recommend freezing this.
More Of My Favorite Sauce Recipes
Join the Conversation (0)
Nutrition Facts
Amount per serving
- Calories N/A
- Total Fat N/A
- Saturated Fat N/A
- Cholesterol N/A
- Sodium N/A
- Total Carbohydrates N/A
- Protein N/A
Hi, I'm Alex!
I love sharing easy, healthy, and family-friendly recipes that anyone can make at home.

Be the first to comment on this recipe!