

Ever wondered how to make cauliflower rice quickly and easily? I have the best kitchen gadget just for that. It’s small, portable, easy to clean and requires no electricity.
Here is a story of how I discovered my favourite kitchen gadget for making cauliflower rice (and many other finely chopped things).
Up until this year, I had a normal kitchen. It wasn’t a big kitchen but it had enough cupboard space to store a few frequently used kitchen appliances, such my spiralizer (for making paleo noodles), a powerful smoothie blender and a food processor.
Whenever I wanted to make cauliflower rice or couscous, or a batch of other finely diced vegetables, pureed soups or condiments, I would often use my food processor. Some days, when I was too lazy to pull it out and then clean it, I would chop things with a knife but that would take me much longer.
But, when we moved into a van for an extended road trip, and my storage space was now considerably smaller, I had to sacrifice my food processor AND my spiralizer (*shed a few tears*). I did keep my small blender! Anyway, at first, I avoided making dishes that required finely diced vegetables or zoodles. Eventually, I started chopping things with a knife and using my peeler to make ribbons out of carrots and zucchini.
Then, I stumbled on a small hand-powered, mini food processor. Our friends in another van were using it to chop onions, garlic and to make small batches of dips and to grind up some nuts.
One day, I gave it a go with some cauliflower florets and found that I could make a batch of finely diced cauliflower kernels in no time at all. The best thing is that this mini chopper is small enough to store in the van, requires no electricity and is very easy to clean.
I purchased one of them in a large supermarket and they seem to be available on Amazon as well, and I’ve been using it A LOT. I think that even if I wasn’t living in a van, I would still use it over a larger, bulkier food processor, which always took time to set up and clean afterwards.
how TO MAKE CAULIFLOWER RICE WITH THIS GADGET
1. It has a couple of sharp removable blades inside the round container. Add your desired vegetable, fruit, nuts, seeds or herbs and make sure you don’t over-fill it (keep the level just under the blades and do chopping in batches if needed).
2. Place the lid on top and press it down with one of your hands. This way you will also secure the whole container in one place.
3. Now, briskly pull the chord out a few times. This action spins the blades really fast (the whole thing just looks like a salad spinner on steroids), grinding and chopping the ingredients inside. The more you pull, the more and faster it spins. I usually do 5-6 pulls for cauliflower rice, but you can do a few spins and check the size of the cubes, then spin it again.
4. Transfer the cauliflower rice into a bowl and add more florets for a bigger batch.
5. Remove the blades and wash the container. Pack away or store somewhere handy.
things you can make with a hand-powered processor
1) Dips such as guacamole or paleo-friendly hummus.
2) Salad dressings, pesto, harissa and other condiments.
3) Curry pastes and chopping onion, ginger, garlic for stir-fries.
4) Chopping onions, carrots and celeries for stews and soups.
5) Pureeing fruit and berries.
6) Pureeing small batches of baby food.
7) Grinding nuts and dried fruit for bliss balls and bars.
And much more!
So there you go! I thought I’d share this useful gadget because it’s been very handy for me for the past year. It’s great for anyone with minimal space (students, shared apartments, small kitchens, road trips/camping trips and so on) and for lazy cooks who can’t be bothered assembling and cleaning a larger-sized food processor or chopping things with a knife.
Look for this mini chopper in your local stores or online, here is a link for it on Amazon. This is just one of the available brands but there are many to choose from.
SAVE THIS POST TO PINTEREST
Very Incredible Basil Sauce Recipe
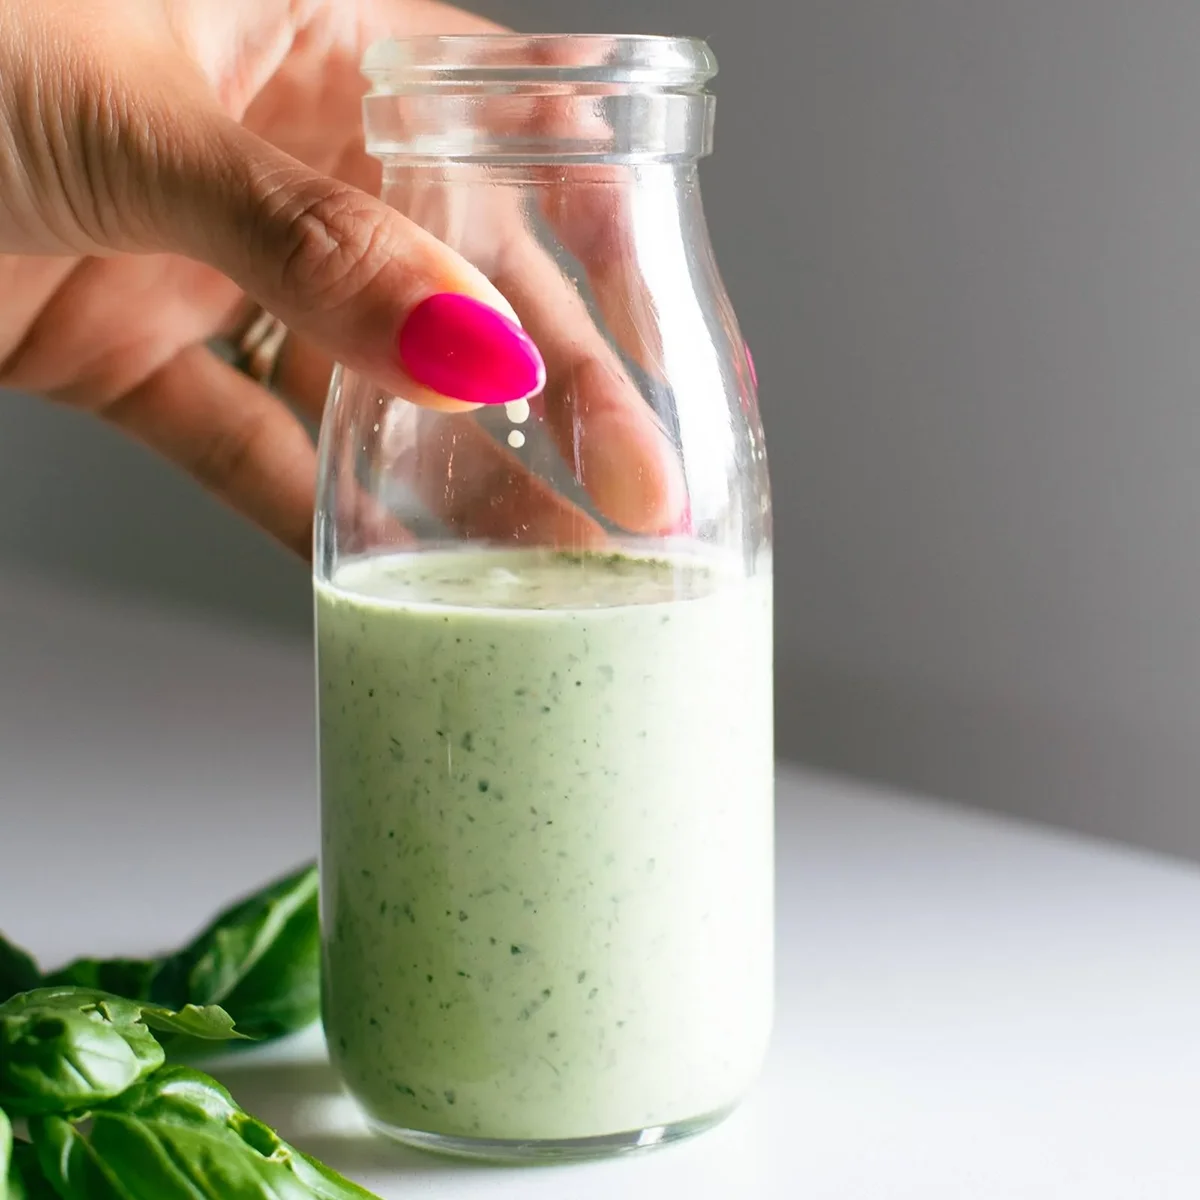
Punchy, salty, bright green sauce packed with fresh basil, chives, garlic, and a bit of oregano. This sauce can be poured out just about anything!
This creamy basil sauce is going on EV-ER-Y-THING in my life: sandwiches, eggs, grilled chicken and veggies, dipped with chips?! It’s so good, packed with green goodness, it’s beautifully summery, and I’m doing the most with it.
In This Post:
The main thing:
Other stuff:
How To Make This Basil Sauce
Step 1: Get All Your Ingredients Ready
You can use a blender, food processor, or a mini-chopper-type gadget. I love this mini-chopper (affiliate link). It’s not meant for sauces necessarily, but I use it all the time because it’s super compact.
Step 2: Blend Your Basil Sauce
That’s it! Just blend, taste, and adjust!
This sauce can be a bit chunky / textured, so keep it going until it has the consistency you want. I prefer something right before completely pureed – where it has just barely noticeable flecks of herbs, but it’s mostly smooth and creamy.
Step 3: Put It On All Your Yummy Things
Like so. (Here’s that recipe.)
Lindsay’s Notes
Ooh baby. Basil, chives, garlic, and a tiny hit of oregano all in a creamy, salty, bright green sauce – I love this so much.
The first time I made this, my toddler (who mostly just eats crackers) found a spatula and just sat at the counter licking the remnants of the sauce out of the blender with me. And I hear that from a lot of people – many kids seem to be very into this for unknown reasons. Sometimes it just hits right, ya know? A+ for that experience.
My favorite thing about this sauce, besides that it tastes like heaven, is that makes healthy-ish eating something I really, actually look forward to.
Baked salmon goes up about 100 notches in my book when smothered in this creamy green sauce. Same goes for shrimp, chicken, and a big fresh salad or lots of roasted veggies.
This will not be the last we see of this sauce, which is why I decided to give it its own post on POY. Welcome home, little basil sauce.
Things You Could Put It On
The possibilities! They are endless.
Description
Punchy, salty, bright green sauce packed with fresh basil, chives, garlic, and a bit of oregano. This sauce can be poured out just about anything!
- Place all your sauce ingredients in a blender or food processor. (I use this mini chopper for the vast majority of my sauces because it’s nice and compact!)
- Blend until you get your desired consistency – I usually go for an almost-completely-smooth texture that is flecked with small bits of herbs.
Notes
Taste and adjust! More lemon juice will wake it up, Parmesan adds more umami and saltiness, and if it gets too salty for you, add a bit more mayo to dilute the pungency a bit!
Keywords: basil sauce, basil dressing
Recipe Card powered byFrequently Asked Questions For Basil Sauce
What can I use instead of mayo?I’ve seen some people on Instagram say they used Greek yogurt and liked it. I haven’t made it this way and I know I wouldn’t like it with Greek yogurt because it’s so tangy and has a different flavor. BUT, if you’re okay with it being a bit different than the original, I think Greek yogurt could work!
I have an egg allergy – what can I use?Vegan mayo has no eggs and tastes great! That’s what I’d use!
How long does the basil sauce last?I usually keep it in the fridge for 3-5 days.
Can you make this vegetarian / vegan?Yes! Use vegan mayo and vegan Parmesan! If you can’t find vegan Parmesan, just throw in a bit of extra salt to compensate for the change in flavor. And if you don’t want to use vegan mayo, try using an avocado like we did in this avocado mojo sauce.
Can you freeze this basil sauce?I would not recommend freezing this.
More Of My Favorite Sauce Recipes
Join the Conversation (0)
Nutrition Facts
Amount per serving
- Calories N/A
- Total Fat N/A
- Saturated Fat N/A
- Cholesterol N/A
- Sodium N/A
- Total Carbohydrates N/A
- Protein N/A
Hi, I'm Alex!
I love sharing easy, healthy, and family-friendly recipes that anyone can make at home.

Be the first to comment on this recipe!