
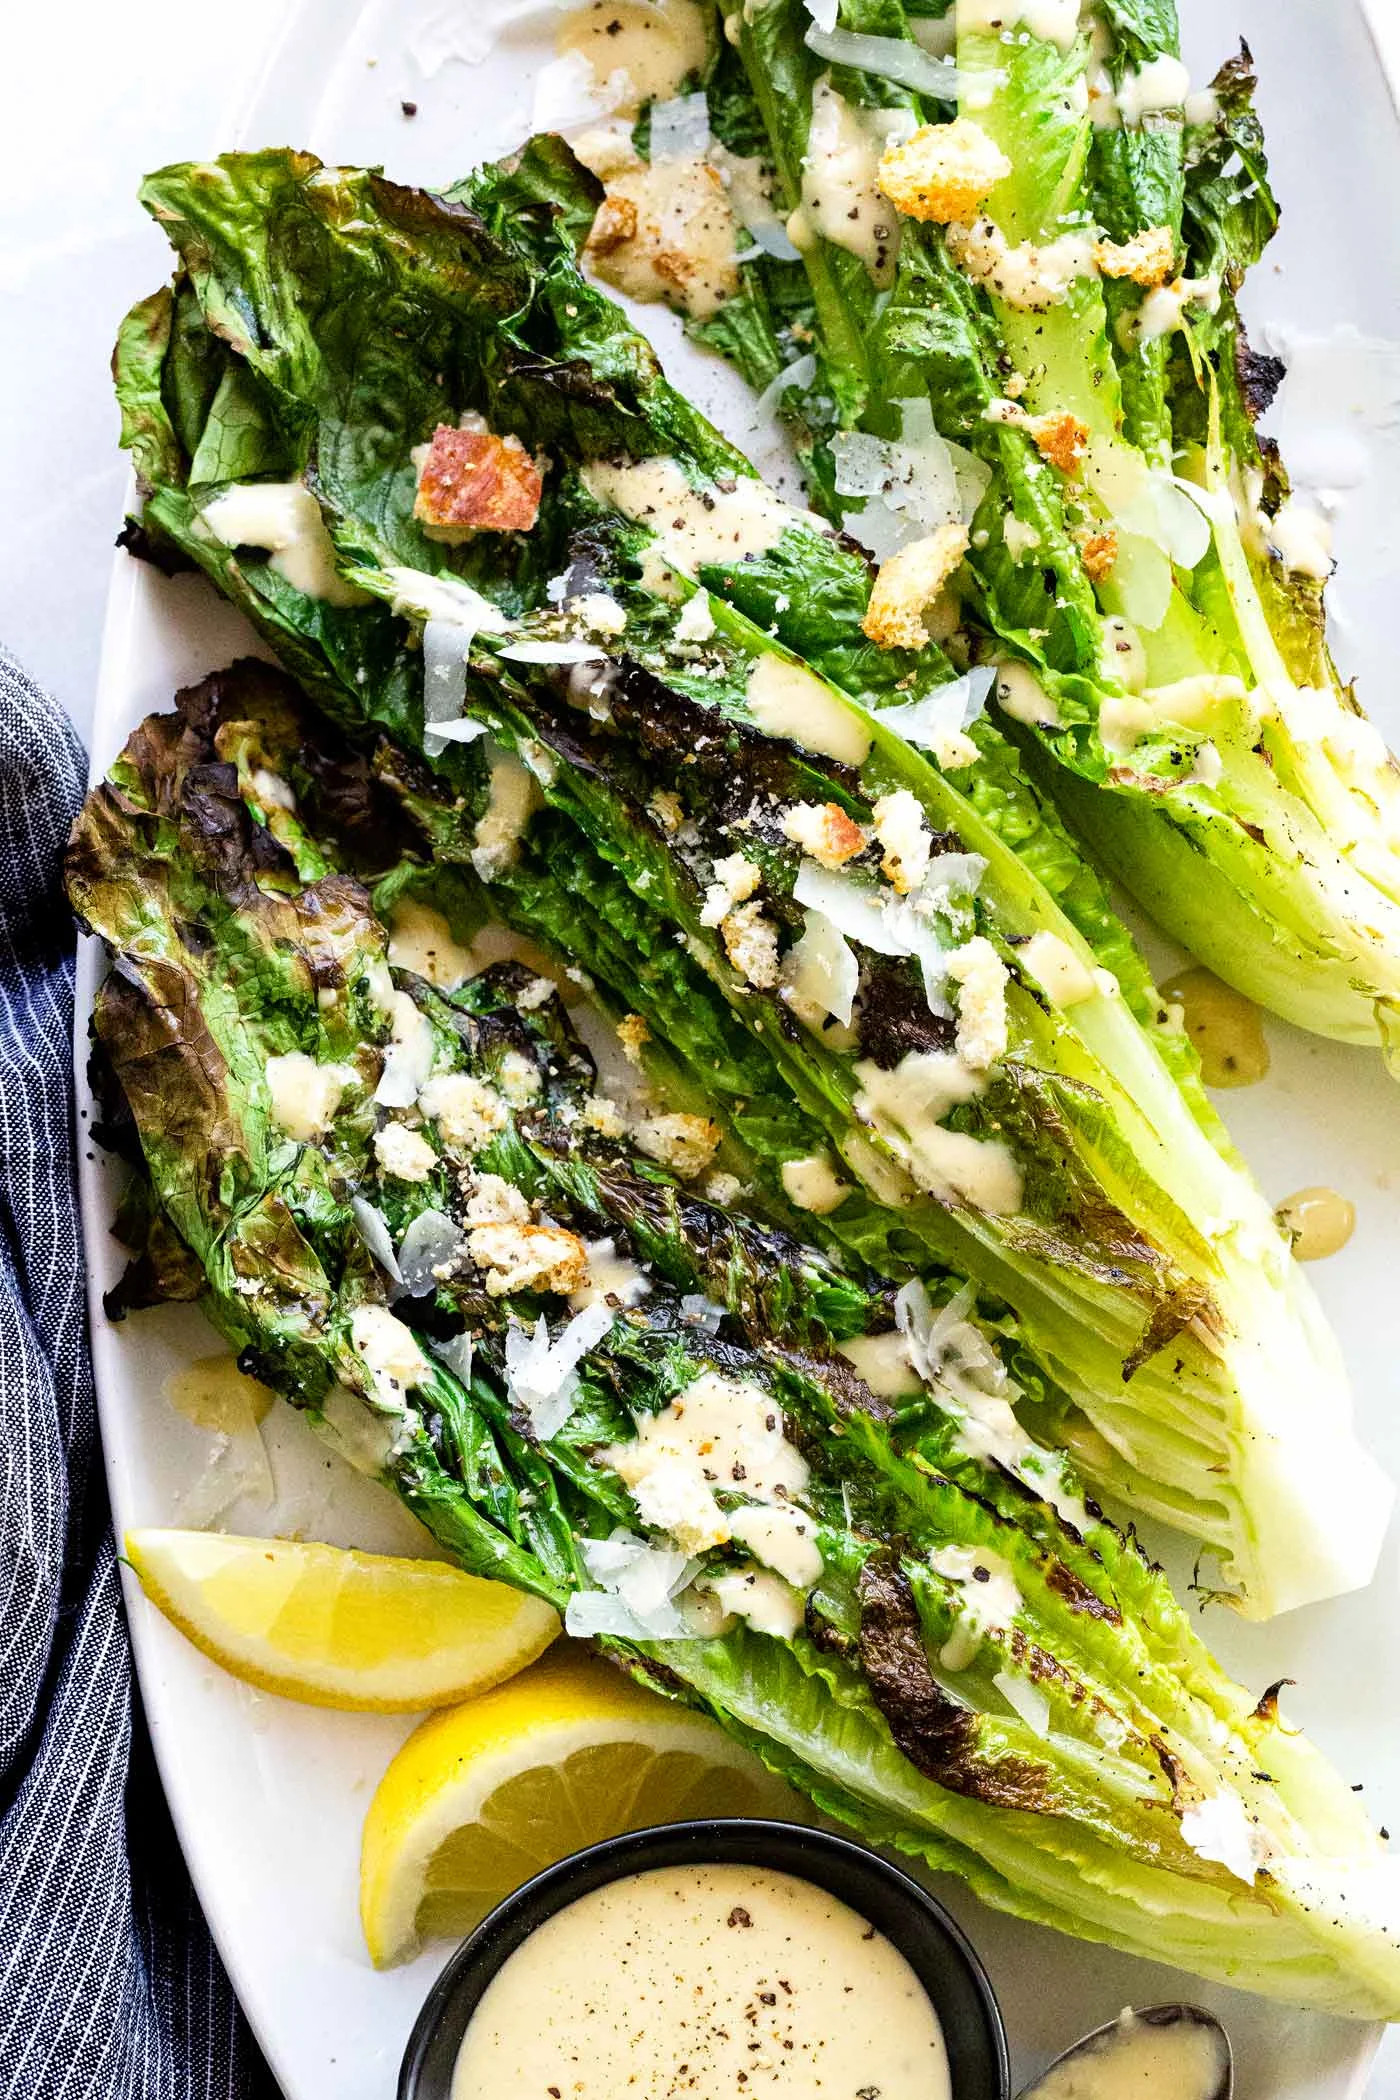
Grilled Caesar Salad is a smokey spin to the classic recipe. Leafy sections of romaine are seared on the barbecue to create a lightly charred texture. The flavors come together with a drizzle of creamy homemade caesar dressing, croutons, and parmesan cheese.
Switch up your typical salad game by grilling the lettuce! The contrast between crisp leaves with lightly grilled warm pieces is unexpectedly delicious. Looking for more tasty salad recipes? Then try Greek Broccoli Pasta Salad, Farro Caprese Salad, or Summer Corn Salad.
Grilled Caesar Salad
Caesar salad is a staple on restaurant menus, but it can be easily made at home. Crisp chopped greens tossed in a creamy anchovy dressing is a classic combination. To take the taste to the next level, the lettuce is grilled to add a hint of char flavor.
It’s important to use hearty types of lettuce like romaine for this recipe. The sturdy structure keeps makes it easy to sear on the grill. This dish is great to make during the summer when you want to cook every meal outdoors.
How to make Grilled Caesar Salad
- Whisk together mayonnaise, lemon juice, anchovy paste, garlic, salt, and pepper.
- Slowly drizzle and whisk in olive oil into the dressing until smooth and creamy.
- Cut the romaine lettuce into quarters. Brush with olive oil and season with salt.
- Heat the grill to medium-high and grease the grates.
- Place the lettuce cut side down, cook until light grill marks appear, 1 to 2 minutes.
- Repeat on the other cut side.
- Serve grilled romaine with caesar dressing, croutons, and parmesan cheese.
How do you grill romaine lettuce?
Learning how to grill romaine is easy! Depending on how large the head of lettuce is, cut it in half or into quarters. To prevent the lettuce from sticking to the grill lightly brush some olive oil on the cut sides. I like to season it with a little bit of kosher salt to enhance the savory flavor.
Sear the lettuce for just a few minutes until light grill marks appear and the edges become toasted. The lettuce should not be completely wilted. The warm edges and cool centers make for a nice taste-texture variation.
How do you make caesar dressing?
The essential ingredients are anchovy paste, parmesan cheese, lemon juice, egg yolks, mustard, minced garlic cloves, and extra-virgin olive oil. I often make a classic caesar salad using egg yolks for the dressing.
If you’re hesitant about using raw eggs, substituting some mayonnaise is a great solution. I did that for this recipe. It has pasteurized yolks and provides a creamy mouthfeel.
What toppings do you add?
Freshly grated aged parmesan cheese is always a must. I love how restaurants add a big speck of black pepper right before eating the salad and have been doing that at home every since.
Whenever I have leftover bread slices or loaves, I make homemade croutons. It’s super easy to prepare and stores for months! Since you have the barbecue fired up, for a more hearty entree salad, add some chopped grilled chicken.
Looking for more grilled salad recipes? Try these ones!
Za’atar Chicken
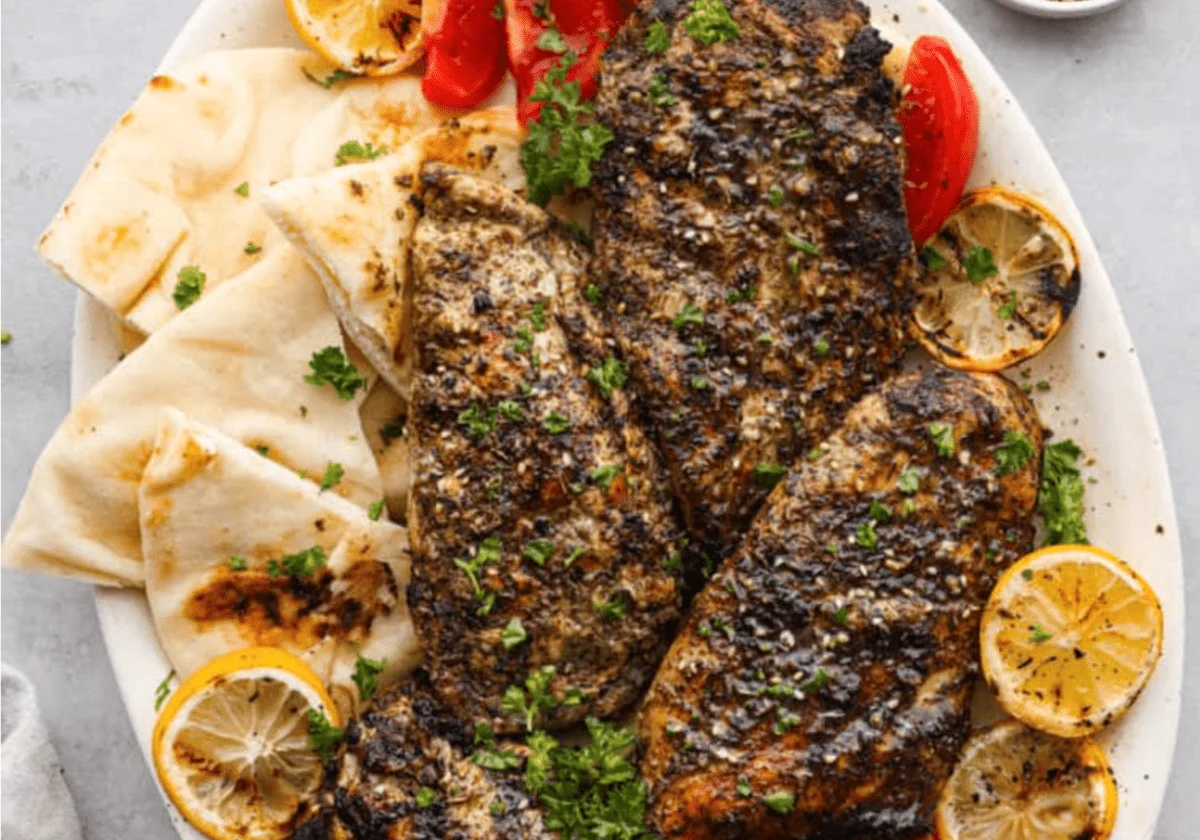
Seasoned with a traditional Middle Eastern Za’atar spice blend and grilled, this Za’atar chicken is juicy and packed with unique flavors. In just 20 minutes you’ll have a flavorful and filling dinner that no one will forget!
If you have never heard of Za’atar seasoning, you are not alone! I just heard of it recently, and now I’m hooked! It’s a great savory blend of warm and earthy seasonings that will really wow your taste buds. You can also make the spice at home! If you like homemade spices, you’ll have to try this Homemade Fajita Seasoning, this better than store bought Italian Seasoning, and this Taco Seasoning too!
Grilled Za’atar Chicken
So at this point you may be wondering what is Za’atar seasoning? It is a blend of savory, nutty, and earthy spices that usually includes oregano, thyme, marjoram, and sumac. There are different blends of Za’atar seasoning based on where you are eating it. Kind of like curry the ingredients can change based on the area it’s made in. I have a link to the Za’atar seasoning blend in the recipe box below too if you want to make it, or you can pick it up from the store.
Grilled Za’atar Chicken is quickly marinated in the Za’atar seasoning and olive oil and grilled to perfection. I really think you are going to love this dish! It’s an easy 20 minute dinner that would go great with some pita bread and hummus. I also love with baba ganoush which goes great with this Za’atar seasoning. You can actually sprinkle some on top and the flavor is incredible. I think this will be a new family favorite!
Ingredients
These simple ingredients combine to make the most delicious and moist chicken. This Za’atar chicken is so unique, and amazingly flavorful! If you are looking for a great easy dinner, then this is the recipe for you! See the recipe card below for exact measurements.
- Boneless Skinless Chicken Breasts: If you get a breast that is really thick, then you’ll want to flatten it out a bit so that it will all cook evenly on the grill.
- Olive Oil: Olive oil is a must for this recipe. It’s a great quality oil that helps the flavors in the seasonings really pop.
- Lemon Juice: Lemon juice is just what this recipe needs to bring out all of these gorgeous flavors!
- Za’atar Seasoning: I love making this blend at home! It is really herby and nutty, and perfect on meat. I add sesame seeds, coriander, and salt to my blend and I think it’s fantastic!
- Garlic: Minced garlic is one of my favorite things to eat on chicken. It’s so full of flavor and makes every bite the perfect one!
Za’atar Chicken Recipe
This recipe is so easy! I love how quickly it comes together and it really is so delicious. I ate it with some tomatoes and pita bread and it was perfection. Some of my kids added salt and pepper, but I thought it was perfect the way it was. You can make it however you like, and I know you are going to love it!

- Whisk: In a small bowl, whisk together the olive oil, lemon juice, za’atar seasoning, and garlic.
- Put in Bag: Place the chicken breasts in a resealable plastic bag then pour the mixture over the chicken.
- Refrigerate: Seal the bag and refrigerate for 30 minutes or up to overnight.
- Grill: Grill chicken breasts on medium-high heat for 7-8 minutes per side or until internal temperature reaches 165° Fahrenheit.
- Enjoy: Let the chicken rest before slicing and enjoying!
Tips for Grilling Chicken
Here are a few simple ways to make yourself the master of the grill! Once your friends and family get a bite of your grilled Za’atar chicken, they’ll be hooked. It’s hard not to be when they’re so juicy and flavorful.
- Use a Thermometer: This step is super important so that your chicken doesn’t dry out on the grill. Use a meat thermometer to check the temperature of your chicken. You can take them off the grill when the temperature inside reaches 165 degrees Fahrenheit. If you cook them any more than that, they may dry out.
- Let Rest: The key to juicy grilled Za’atar chicken is letting it rest for a minute or two after you pull it off the grill. This allows all of the tasty juices to reabsorb, giving you chicken breast that will melt in your mouth! If you cut into them too soon after grilling, those juices may be released instead of absorbing back into the meat.
- Dripping: If you have seasoning and oil dripping off of your chicken, it will make the flames touch the meat and that’s where the black burned part comes from. If you don’t want crispy crunchy parts on your chicken, make sure that your seasoning is all over your chicken, but not dripping off.
Storing Leftovers
Who doesn’t wan’t grilled Za’atar chicken for leftovers? This recipe makes enough to serve eight people, so if you need to save your leftovers here is how.
In the Refrigerator: Store your cooled chicken in an airtight container in the fridge for up to 4 days.
More Chicken Recipes
I love a simple chicken dinner! But sometimes chicken can taste boring when you are always making it the same way. Here are some recipes that will give you great ideas to keep your chicken tasting unique and juicy!
Join the Conversation (0)
Nutrition Facts
Amount per serving
- Calories N/A
- Total Fat N/A
- Saturated Fat N/A
- Cholesterol N/A
- Sodium N/A
- Total Carbohydrates N/A
- Protein N/A
Hi, I'm Alex!
I love sharing easy, healthy, and family-friendly recipes that anyone can make at home.

Be the first to comment on this recipe!